Classic Granny Square: Free Pattern and Easy Instructions
Soft wool loops create a warm texture that feels substantial in your hands, offering a grounded rhythm that settles the mind after a long day. These handmade squares serve as the backbone for heirloom blankets, structured shopping bags, and simple cushions that brighten up any corner of your living room. Working through each round offers a quiet sense of progress as you master the basic double crochet cluster and join your stitches to form a crisp corner. This project welcomes those just picking up a hook for the first time while providing a reliable go-to for experienced makers needing a quick, portable task.
Why You’ll Love This Pattern
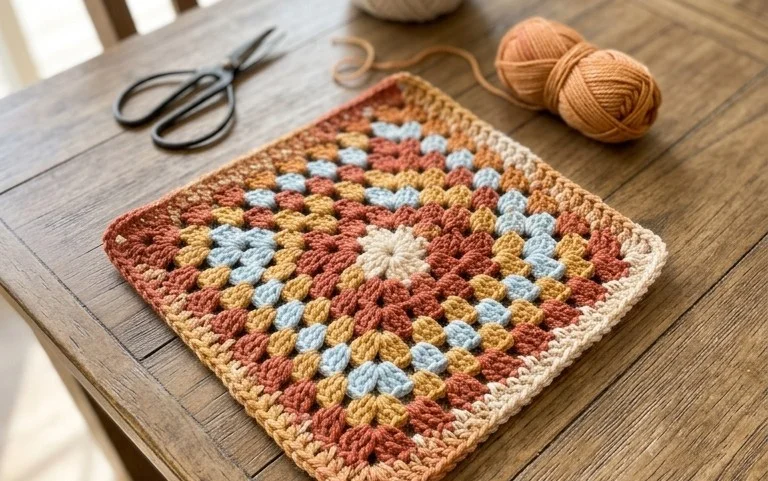
The Classic Crochet Granny Square is the fundamental building block of crochet design. This specific pattern creates a traditional five-round square that features a balanced ratio of clusters to chain spaces, ensuring the piece lays perfectly flat without ruffling or cupping. It serves as an ideal scrap-buster project because each round can be worked in a different color to use up small bits of leftover yarn. The repetitive nature of the double crochet clusters provides a rhythmic, meditative experience that is easy to pick up and put down during a busy day. Its versatility allows you to connect these squares into blankets, tote bags, or decorative cushions.
I finally mastered the granny square with this guide because the instructions for the corners are so clear and prevented my square from twisting.
— Sarah, hobbyist crafter
Pattern Overview & Skill Level
- Skill Level: Beginner
- Approximate Time: 30 to 45 minutes per square
- Construction: Worked in joined rounds, starting from the center and expanding outward
- Finished Dimensions: Approximately 5 inches by 5 inches using worsted weight yarn
Materials & Supplies Needed
- Yarn: Worsted #4 weight, 100% wool or acrylic blend, approximately 20-25 yards per square
- Hook Size: 5.0 mm / H-8
- Notions: Tapestry needle for weaving in ends, scissors, and optional stitch markers
- Safe yarn substitutions: You may use DK weight yarn for a smaller, delicate square, but you will need to increase the number of rounds to reach the same physical size. Using bulky weight yarn will result in a larger, thicker square and will require a 6.0 mm hook.
Stitch Guide & Abbreviations (US Terms)
- ch: Chain
- st/sts: Stitch/stitches
- sl st: Slip stitch
- dc: Double crochet
- dc cluster: A set of 3 double crochets worked into the same space
- sp: Space created by a chain
- MR: Magic Ring
Step-by-Step Pattern Instructions
This pattern is worked in rounds. At the end of each round, join with a slip stitch to the top of the beginning chain or the first stitch as indicated. Carry your yarn up or fasten off and reattach if you prefer a seamless color change.
Granny Square Body
Rnd 1: Start with a MR. Ch 3 (counts as first dc here and throughout), work 2 dc into the ring, ch 2, *3 dc into the ring, ch 2; repeat from * twice more. Join with a sl st to the top of the initial ch 3. (12 dc, 4 ch-2 spaces)
Rnd 2: Sl st into the next ch-2 space. Ch 3, 2 dc in same sp, ch 2, 3 dc in same sp (first corner made). *Ch 1, skip 3 dc, (3 dc, ch 2, 3 dc) in the next ch-2 sp; repeat from * twice more. Ch 1, join with a sl st to the top of the initial ch 3. (24 dc, 4 ch-2 spaces, 4 ch-1 spaces)
Rnd 3: Sl st into the corner ch-2 sp. Ch 3, 2 dc in same sp, ch 2, 3 dc in same sp. *Ch 1, 3 dc in the next ch-1 sp, ch 1, (3 dc, ch 2, 3 dc) in the next corner ch-2 sp; repeat from * twice more. Ch 1, 3 dc in the last ch-1 sp, ch 1, join with a sl st to the top of the initial ch 3. (36 dc, 4 ch-2 spaces, 8 ch-1 spaces)
Rnd 4: Sl st into the corner ch-2 sp. Ch 3, 2 dc in same sp, ch 2, 3 dc in same sp. *Ch 1, (3 dc in next ch-1 sp, ch 1) across the side to the next corner, (3 dc, ch 2, 3 dc) in the corner ch-2 sp; repeat from * twice more. Ch 1, 3 dc in last ch-1 sp, ch 1, join with a sl st to the top of the initial ch 3. (48 dc, 4 ch-2 spaces, 12 ch-1 spaces)
Rnd 5: Repeat Rnd 4 to finish the square. Fasten off and weave in all ends securely on the back of the work. (60 dc, 4 ch-2 spaces, 16 ch-1 spaces)
Care & Washing Instructions
- Hand wash in cool water using a mild wool-safe detergent to preserve fiber integrity.
- Lay the square flat on a clean towel and reshape it gently to dry; do not wring or twist.
- If the square appears slightly distorted, lightly steam block it on a flat surface using a steam iron held an inch above the fabric.
Pro Tips & Common Mistakes to Avoid
Maintain consistent tension by ensuring your yarn wraps around your fingers with the same amount of resistance in every round. Using a stitch marker in the first chain of your round helps you identify the exact spot for the final slip stitch, preventing the common mistake of joining into the wrong stitch. Weave your ends in by running the needle through the back loops of the same color stitches to keep the reverse side clean. If you choose to increase the size of the square by adding more rounds, remember that each subsequent round adds four more dc clusters and four more chain spaces, which will significantly increase your total yarn consumption.
Frequently Asked Questions
Can I substitute acrylic yarn for wool in this pattern?
Yes, acrylic yarn is an excellent substitute for this project as it is durable and easy to wash, though it may have less drape than wool.
Why is my square curling at the edges?
Curling usually happens if your tension is too tight or if you have accidentally skipped one of the chain-1 spaces between the clusters along the sides.
Is this project suitable for someone who has never crocheted before?
This pattern is beginner-friendly, but if you are brand new to the craft, practice making a chain and double crochet stitch on a scrap piece of yarn before starting the magic ring.
Can I sell the finished squares that I make from this pattern?
Please check the individual designer’s terms or website policy regarding the sale of finished goods, as usage rights can vary between independent pattern creators.
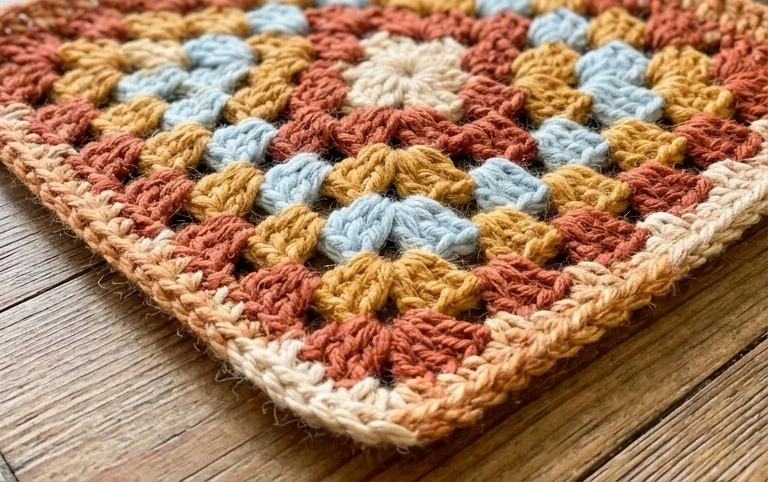
You now hold a solid five-inch piece that marks the start of a much larger creation. Try using a soft cotton blend if you want a lighter finish, or swap to a chunky yarn to make a thicker, oversized version for cold winter evenings. Seeing how these colors come together is the best part of the process, so please share a photo of your finished work online. You can find more free instructions and project ideas available right here on the blog to keep your hands busy all weekend.